In the quest to look creative and classy, piercings have become a beloved form of self-expression. From traditional ear piercings to bold facial adornments, the variety is endless. Recently, dermal piercings have surged in popularity, captivating the attention of those seeking a unique and trendy look. These piercings, which can be placed almost anywhere on the body, offer a striking aesthetic that sets them apart. Whether you’re new to the world of body modification or a seasoned enthusiast, we’ve got you covered with everything you need to know about dermal piercings. Dive into our comprehensive guide to explore this fascinating trend and learn how to make it a part of your personal style.
What is Dermal piercing:
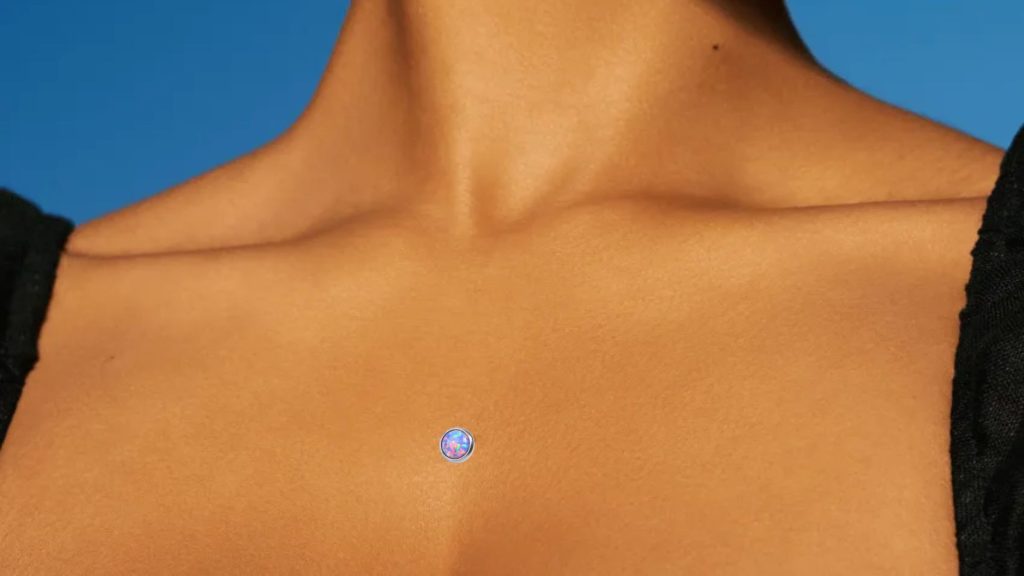
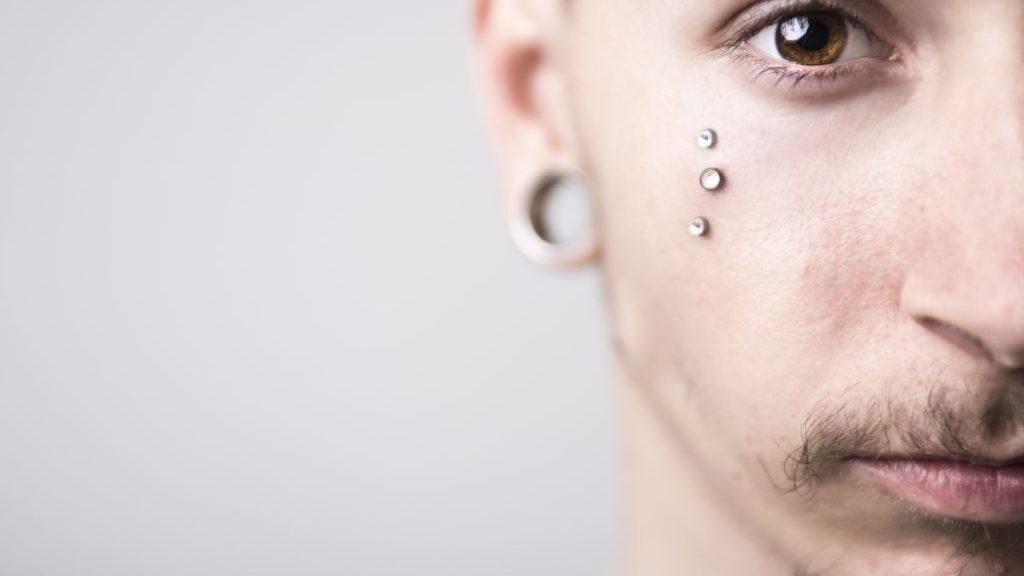
Dermal piercings are also known as micro dermal piercings; they are different from other piercings as they lie flat on the skin and have only one entry point. The dermal anchor is installed directly under the skin, and the other part of the jewellery is inserted into the anchor. You can find its placement mostly under the eyes or on the collar bones, back dimples, arms, hips, or chest. However, if we talk about its pain level and healing time, we rate the pain as 3/10, and its healing time takes up to four months to completely heal.
Process of Dermal Piercing:
The process of dermal piercing is not at all complicated. Your piercer starts with cleaning your skin before creating a hole to ensure no bacteria gets into the fresh wound.
- Marking will be done to ensure the accurate placement of the jewellery.
- After marking, your piercer will create a piercing hole of 1.5 to 2mm via need or skin punch to create a space or pocket where the metal will be placed.
- Using hands or forceps, your piercer will insert the jewellery anchor into the small opening completely under the skin. Once it gets all set, the top is screwed into it.
Aftercare
- Keep it clean and pat dry with a towel.
- Minimize exposure to anything that can stick to it.
- Use a band-aid to keep it protected.
- During the healing phase, cover the piercing site for at least seven days.
- Cover the piercing site during showers.
- Avoid swimming, hot tubs and baths until it heals completely.
Changing a Dermal Piercing Jewellery
Changing a dermal piercing jewellery needs a lot of care. Here are some things you should know before changing the jewellery.
- The first and foremost thing is to ensure that your piercing is completely healed. Only then can you change the dermal jewellery.
- Wash your hands and piercings with saline solution or antibacterial soap before changing the jewellery.
- Detach the top of the jewellery by twisting it in a counterclockwise direction.
- When you successfully detach the top, put your new jewellery and twist it in a clockwise direction.
It is important to note that if you have difficulty unscrewing the jewellery top, consult your piercer and don’t apply unnecessary force.
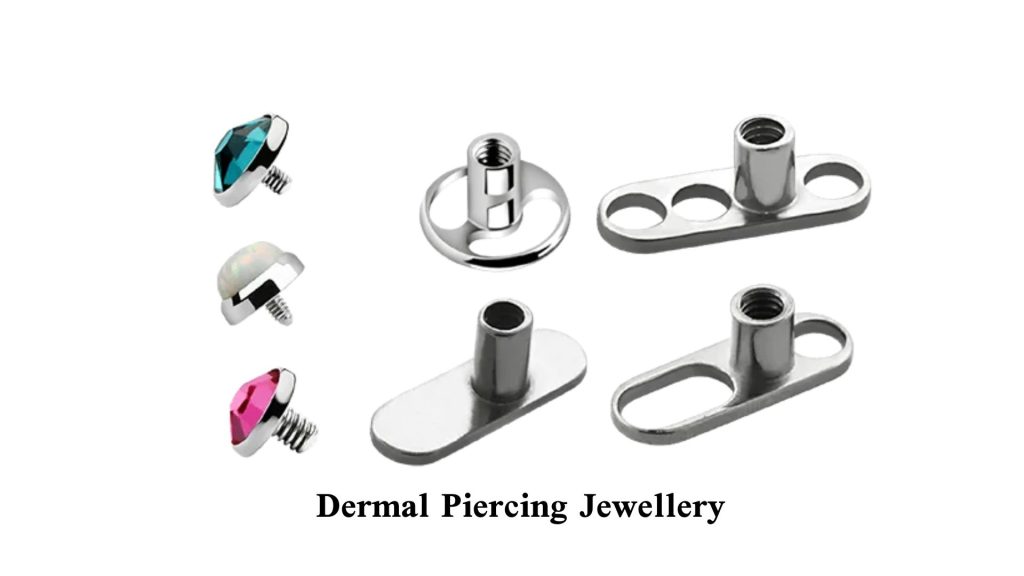
Components of Dermal Piercings Jewellery
Dermal Anchor:
These are small in size, so they properly get into the skin. The main component can’t be changed as it is beneath the skin. There are two main types: the first one is flat-footed, which goes more profoundly into the skin and is more secure, and the second type has a rounded base, which causes less pain when inserted into the skin.
Dermal Top:
You might know the dermal top is that visible part of the jewellery that is screwed onto the anchor and can be easily changed and is removable. However, it would help if you go to your piercer before changing the dermal top.
Diver:
Another option you might encounter is a dermal diver. It consists of a pointed-end base with already-set jewellery on it. It can be inserted using a punch technique, and you cannot change the jewellery once it is placed.
If you are eager to get this piercing done than it is always recommended to do a complete research and find an experienced professional with the relevant knowledge regarding the piercings.